The complete and utterly thorough way
to photograph a two dimensional work of Art:
This is the technique for documenting paintings of all mediums;
Watercolour, acrylic, oil, encaustic, etc…
The same technique is used for:
screen prints, etchings, drawings, and all forms of printmaking.
Fabric, fibre and textile based works of art.
This guide is for photographing any and all works of art that are primarily two dimensional.
The art can be framed, with or without glass, or unframed.
The Camera;
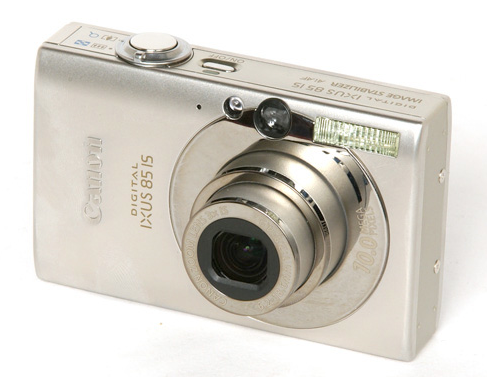
Hopefully one has a better camera than a little point and shoot.
These cameras don’t let you control the focus very easily or have good lenses.
Focus is critical, so these little cameras fall short of what we need.
They also don’t have the ability to create RAW files, which is crucial for optimum colour control.
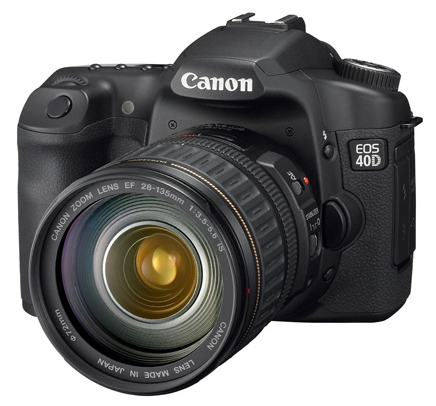
One should have a DSLR.
A Digital Single Lens Reflex.
(The cameras where the lenses can be removed.)
A full sized DSLR camera will allow you to get much higher quality glass (a good lens) and give you a better quality CMOS or CCD light sensor.
Each component in the camera will allow us to get better pictures; a good lens with good optics that allows for fine and controlled focusing, a good sensor with many pixels spread over a large area (full sized 35mm x 24mm or an APS-C sized sensor, 22mm x 15mm) so the image quality is good.
Little point and shoot cameras do not have the above qualities.
The Studio;
Hang the art work on a wall at about chest height so it is perfectly vertical and horizontal.
This makes it easier to shoot the work straight on.
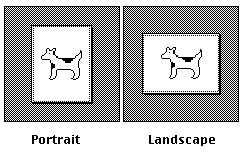
Shoot all art in a landscape position even though it might be a portrait piece. It is easier to rotate the art than to rotate the camera.
It makes no difference anyway because the lighting will be even and uniform. Things will be rotated later in Photoshop.
It is best to shoot the art as directly straight on as possible so everything from corner to corner can be in focus and undistorted.
In other words, we want the camera to be as perpendicular to the plane of the art as possible.
It also makes it easier to measure the elevation of the lights and camera and make sure they are all at the same height as the middle of the work.
(It can lean back slightly if it is on an easel or on a plinth against a wall.
The camera and tripod will make adjustments later on to see the art flatly.
If one is quite anal then it would probably make one feel better to hang everything on a perfectly vertical surface
but life is not perfectly vertical, so we do the best we can.)
If the art is unmatted and unframed and is a thin sheet of paper that can not stand under its own strength then it will have to be hung gently from clips.
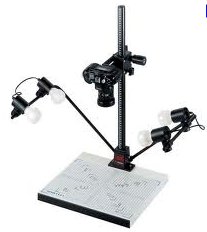
A copy stand can also be used for small and / or flimsy works so the art can safely lay down and be shot from above.
If one had to choose between having only a copy stand or a shooting gallery as described above, it would be best to choose the gallery. Copy stands are only good for smaller works (perhaps no larger than three feet by two feet) and might require buying a wider angle lens.
A shooting gallery can handle large and smaller works.
A flat bed scanner can also be used to scan small works, (small being less than the standard 8 1/2 by 11 inch piece of paper) as long as the art is perfectly flat and matte. Shiny and textured little oil paintings will not fare well in the scanner. Ink drawings on opaque paper and similar works will do well. We will be doing some experiments in the future about this technique to see if the colour management is as good as a camera. Stay tuned!
The lights should be identical with identical stands; this helps with setting them up equally. (The bulbs used should be identical. I have found manufacturers make products with wide ranging qualities even though they are labelled the same.)
Set up two 500 watt to 1000 watt lights at about the same height as the middle of the art.
100 watt lights are too weak and will have to be placed very close to the art in order to get enough light.
This is bad because larger works (say four feet by four feet or bigger) will be too dimly lit when the lights are moved back to try and cover the whole work with light.
It is not necessary to diffuse the light with umbrellas or bounce it off reflectors. (Soft light)
The bare bulb (hard light) is fine and even causes more contrast when compared to diffuse light.
A bit more contrast is alright and sometimes beneficial to get a picture that truly represents the art.
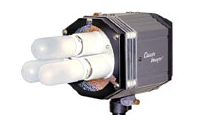
Do not use lamps where there is more than one bulb.
Having more than one bulb per side raises the risk of non symmetrical lighting and uneven white balance.
All four or six bulbs in the two lights would have to be manufactured in the same batch in the same factory at the same time; this is unlikely.
I am saying this because I own two Q-750 lights and they give off different colours and quantities of light, even though they all have the “same” bulbs in them.
We do not want any light other than the two main lights to affect the art, so close the curtains and have no other lights on in the room.
The walls of the room should NOT be a bright vibrant colour (if you can help it) and there should be nothing near the painting which could bounce light onto the art, like a big red couch.
Drape all such coloured surfaces with black or grey cloth.
If the two dimensional art work is sitting on a table or plinth, cover the plinth top with black cloth and put the art on that.
If the plinth is white or coloured it will bounce that light onto the bottom of the art. This is bad because it will make the bottom of the art slightly brighter than the rest.
Place each light about 6 feet from the wall and 8 feet from the art.
The two lights should be set up symmetrically to the art.
Almost every book that bothers to mention how to photograph art says to set the lights up 45 degrees from the wall the art is on.
This is arbitrary.
The goal is to get the lights to illuminate the area where the art is as evenly as possible so the angle may be more or less than 45 degrees.
Place an opaque object near the focus point of the art and look at the shadows. Are they the same colour, brightness and angle? If not, adjust the lights.
It is important to test this. Do not assume the lights are equal until you see the shadows cast are equally dark and of the same colour.
If the lights are too close to the art then hot spots (brighter areas of light) may occur, and also might heat up the art. Try to avoid melting the art.
If the lights are too far away then there will not be enough light and the exposure of the camera will be so long that tripod vibration might become a factor and this will dull the image.
A shutter speed of one tenth of a second or shorter is fair enough. We will be using a tripod of course.
Using very bright lights on a work of art will not damage it over a short period of time. To our knowledge all of the major Canadian, and we could assume American and the rest of the world’s galleries use this technique. Studio flashes could be used in the same way described here but it is more difficult to see and avoid reflection problems, uneven lighting issues and exposure.
Do not use fluorescent bulbs.
Use the tungsten bulbs that get very hot.
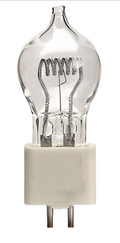
I use two Smith Victor SG 700 lamps that take one 600 watt DYH bulb each.
Don’t bother with fluorescent bulbs.
The fluorescent bulbs do not put out the full spectrum of light so colours appear odd.
Tungsten lights approximate natural light from the sun so colours appear more accurate and natural.
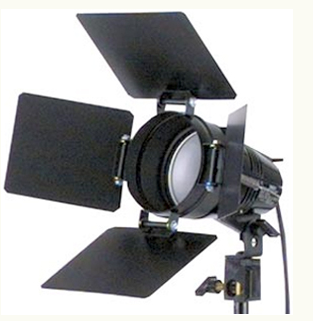
Use barn doors to prevent excess light spilling around the room. We only want to light the art.
The camera used should have a high quality lens.
Point and shoot cameras have tiny lenses (and tiny little digital sensors) which are not good enough to properly represent the art.
Film can be of a higher quality than digital but only if the film is 6×6 cm or higher.
Using the digital medium is better than film in this type of photography work because of many reasons:
Film has an ongoing cost of buying the film and processing it. If a digital camera takes 5000 images a year, which is very few for a professional or even a serious amateur, that is the equivalent of 139 rolls of 36mm film. The cost of this film and the processing would conservatively cost about $2000. You could buy a nice digital SLR and a good lens for that.
Digital is instantaneous and you can see if the proper shot was achieved or not.
The final destination for images of the art are in the digital realm so film would have to be digitized anyway.
Sending digital images across town or across the planet is free AND much faster than conventional mail.
All posters, pamphlets, books, and of course websites are designed with computers so the images need to be digital.
Digital can be colour corrected, along with other valuable actions such as cropping, resizing, sharpening, patching and transforming in an instant.
Film can be manipulated similarly, but only if it is scanned digitally.
The colour of the lights used in the studio can be compensated for within the digital camera settings; film requires you use many types of filters.
The digital camera used should be 12 mega pixels or higher. This is about the same quality as 35 mm slide film.
The lens used should be professional: fixed focal length (prime), no zooms. An aperture of f 1.4 to f 2.0 at widest opening. Focal length 80 mm to 100mm
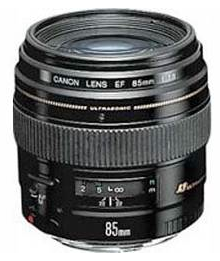
(The Canon 50 mm f 1.4 lens has some barrel distortion which makes the straight edges of the painting look slightly curved. The Canon 85 mm f 1.8 is fine.)
The Canon 85mm f1.2 has better glass but is quite expensive and not worth it.
Place the camera on a sturdy tripod.
A three way geared head is the best but any three way head will do.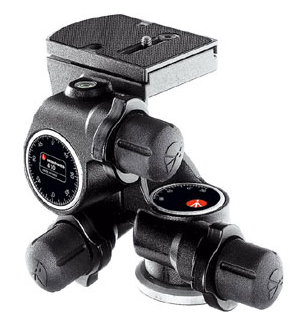
Video heads and ball heads are annoying because they are either too restrictive or too floppy when trying to size up something rectangular like a painting.
A geared head allows fine adjustment in all three dimensions separately, so you can easily shoot the work bang on.
Place the camera so the lens is at the same height as the middle of the painting.
Have the painting fill as much the camera frame as possible by moving the camera closer or further away from the art.
Remember, no zoom lenses, you have to move to “zoom”.
If the painting is not perfectly vertical, as is sometimes the case when it has to lean back a bit towards the wall or on the easel, then raise the camera up a bit.
Use the viewfinder to see if you are perpendicular to the art.
The edges of the viewfinder should be parallel to the edge of the art, providing the art is straight edged with 90 degree corners.
This is a good trick to make sure you are shooting straight on. This trick is only possible if you have a three way head. A ball head loses all the x, y and z positioning once you loosen it to adjust.
If there are glossy paints or metal or glass used in the art work then the art will act like a mirror; this is bad.
(A 4×5 large format studio camera can get around this problem with some fancy manipulations, but we will concentrate on digital for now.)
If the work is framed behind glass or plexiglass, glazed, then you might see yourself or the camera in the reflection.
This is why we don’t want to light the rest of the room. If light is falling on you, the tripod and other things in the room, then it is more likely they will show up in the glass reflection.
Take a four foot by four foot (or bigger) piece of black foam core and cut a hole directly in the centre large enough for your lens.
Hang this on the front of your camera (the lens pokes through the hole of course) when shooting glazed art to avoid any distracting reflections appearing in the art.
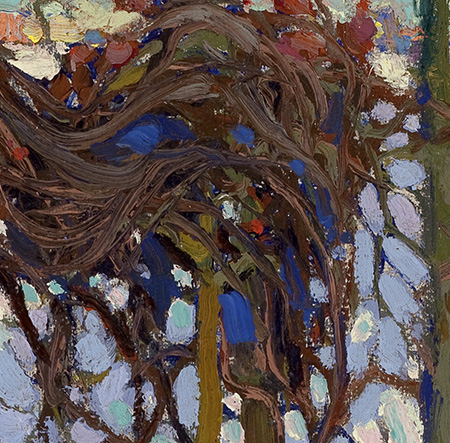
Black and dark colours of oil paint are notably troublesome for reflections because of the glossiness.
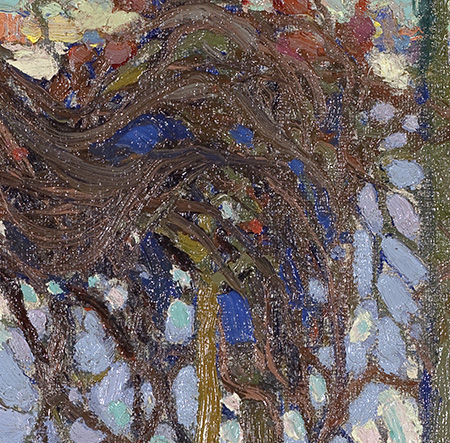
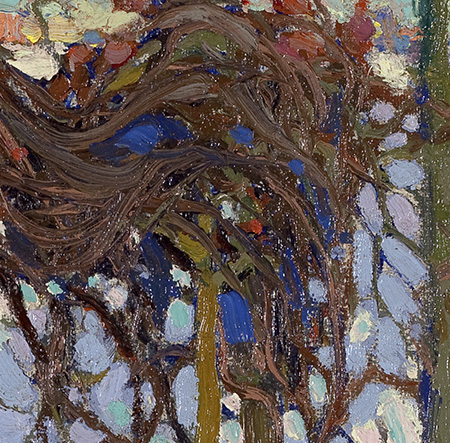
These reflections are called speculars and can be seen in brush strokes and curved areas of paint.
Having specular points in ridges and areas of paint can be distracting to the viewer and detractive to the art. See fig 1
The first tactic to try and fix this problem is to move the lights closer to the wall, keeping them equally distant from the art, and the camera. (More obtuse angle, less acute.)
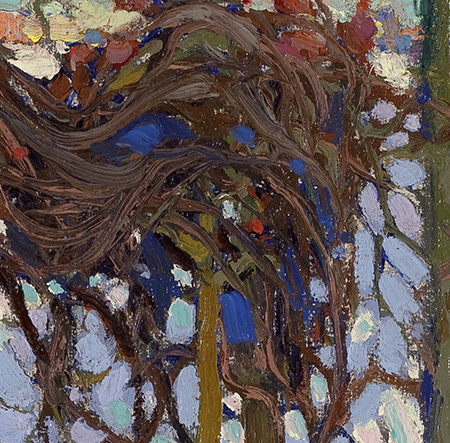
If the speculars are still a problem then place a linear polarizer on the lens and rotate it to a position where the speculars are decreased. See fig 2
Linear and circular polarizers are similar but different. Most camera stores only sell circulars because of the modern cameras.
Modern cameras with their auto focus systems can not “see” properly through a linear polarizer lens.
This was not a problem for the previous era of fully manual focus lenses where the human was in charge of focusing.
Circular pols are not as “strong” as linear pols. i.e. circular pols do not have nearly as much success in blocking out the speculars as linear pols do.
If the speculars still persist then sheets of polarizer film must be placed in front of each light.
The film must be placed the correct way up (matched to each other) and not too close to the lights. (Melting hazard!)
While looking through the camera rotate the pol filter so that the speculars almost disappear entirely. (%80 to %90)
Using polarized light and a polarized filter on the lens is enough to remove ALL reflections.
If this occurs then the painting will look overly flat and a little odd like it is made out of plastic. See fig 3
If just a little of the specular nature is let through, then the art will look more like what we come to expect and will not look fake or touched up. See fig 4
Polarization and Oil Paintings:
Settings on the camera:
Lowest ISO. 100 or 50 is usually the lowest a camera can go. There is very little digital noise at low settings.
Aperture f 8. If the lens is used wide open, (f 1.8), then the depth of field is so thin that the focus has to be perfect. There is no room for error.
Purple fringing in speculars also becomes pronounced at wider apertures, which is bad.
Lenses are at their sharpest when used in the middle of their aperture range. This is an optical fact.
Shoot RAW files in Adobe RGB.
This allows for many powerful corrections to be employed after the photo is taken.
White balance about 3100 K. Use a grey card (not the white side) to check. Tungsten is usually around 3100 K.
Meter off the grey card to get the proper shutter speed. It will be around 1/10 to 1/30 sec.
Shoot in Manual not Program mode.
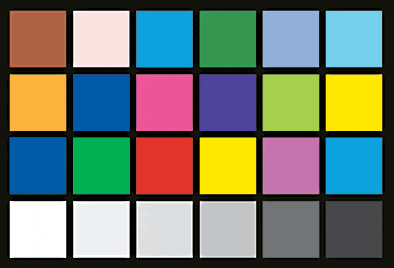
Place a MacBeth X-Rite colour checker card in the frame of every art work you document.
The grey strip at the bottom is the most crucial. I have found trying to balance the ENTIRE checker results in a head ache and lost time.
It is futile to try and get all of the RGB values to match exactly.
Concentrate on the six values of white to black and this will allow us to set the exposure and contrast in the picture correctly.
It is not necessary to bracket the shots as long as you have a mostly correct exposure.
This is of course an obvious thing to say, but many people still feel the need to bracket. If you meter correctly then you should be able to nail it with one shot.
In RAW you can safely adjust a half a stop up and down (or more!) to get the exposure correct.
As long as the lights do not move, the fact that some art is all white or all black will not change the exposure.
In other words, when we are metering the incidental light, a white painting, a dark painting or a pencil line drawing will all be shot with the same shutter and aperture (and ISO) settings.
Remotely focusing and triggering the camera from a computer is ideal.
It allows for the finest of focusing and vibration free triggering.
It is also easier on the eyes and neck not having to squint through the viewfinder, or only see the preview on the back of the camera.
Set the software so that each file goes directly into a folder that is accessed by Adobe Bridge.
The files should not be stored in the camera and should go into the computer.
The files can be previewed in Adobe Bridge and then clicked on to be opened in Adobe Raw reader to begin processing.
Take the eye dropper tool (I) and place it over the second brightest grey square. It should be valued 200 200 200.
Raise the exposure slider to get it up to the right level and click the tool on it to set the WB.
I find that 199 198 and 200 is sometimes as close as it will get.
200 200 200 is perfect but if it is less than 5 values off, then it is nearly impossible to tell.
The curves window can be preset so the grey values are correct.
A small amount of sharpening, vibrancy and colour correction can be done here.
Don’t over do it.
Look at your computer screen and compare it to the art. Does it look the same?
I could mention calibrating your computer screen at this point, but since hardly anyone else on the planet calibrates their screen then the exercise is rather defeated.
Only monitors attached directly to photo printers should be calibrated; the rest of us have to get by with the factory set up and cross our fingers.
All of the above values can be set in a preset so every picture can be treated similarly.
As long as the lights do not move too much the curves should set the contrast within the image at the proper levels.
Export to Photoshop as a 16 bit TIFF or PSD file at full size.
In PS crop the painting right to the edges. Usually the frame is not wanted in the shot. Do not cut off too much.
Use the SKEW function in the TRANSFORM folder to pull the corners into shape. The painting should be as close to perfectly rectangular or square as possible.
Sharpen again but not too much. Over sharpening will look unnatural. The goal is to make it look good, but also make it look like you did nothing at all.
Adjust colour as necessary. I find the blues and greens can be the most touchy. Use the Hue and Saturation window. (Command U)
Add contrast as necessary. A pencil or pen drawing could stand more contrast than a painting.
Save the image as a full size TIFF (8 bit)
Resize the image to 1500 pixels and 500 pixels and save each as a jpg.
Do not rename the files. The original numbers assigned by the camera are good enough.
Organize the files by putting them into named and dated folders.
Leif Norman

Valerie
Hi! This post just rocked my world…. I have been looking for this exact information, and here it is, all in one spot!!
I am an amateur about to embark on a steep learning curve of photographing a large private collection of maps and artwork. I am planning on using a copy stand for most of it…
Thanks so much for the info ! 😀
Leif Norman
Great! That’s why I wrote it. Glad it is useful.